Installing Gitea on Container Station
Following up on the previous Container Station topic, this time I’ll record the process of installing Gitea on Container Station. Gitea is a Go-based Git server that’s supposedly very lightweight. I’ve been using GitBucket (which is Java-based) until now, but migrating to Gitea should significantly reduce memory usage, plus it can run GitHub Actions-compatible workflows (Gitea Actions). Since I just started blogging, I decided to migrate while keeping records of the process.
The goal is to get Gitea Actions working and to be able to push container images to Gitea’s container registry.
Note: This article assumes local operation in a home QNAP environment. For simplicity, HTTP communication is used, but if you plan to expose it to the internet, make sure to configure HTTPS. Also, use stronger passwords for the database in actual production environments.
Work Procedure
- Install Gitea
- Install Gitea Runner
- Verify operation
The installation is split into two docker-compose.yaml files. We need to install Gitea first and obtain the token needed for the Gitea Runner installation.
Installing Gitea
First, create the following docker-compose.yaml for installing Gitea itself.
version: "3.7"
services:
  gitea:
    image: gitea/gitea:1.21
    container_name: gitea_web
    environment:
      - USER_UID=1000
      - USER_GID=1000
      - GITEA__database__DB_TYPE=postgres
      - GITEA__database__HOST=db:5432
      - GITEA__database__NAME=gitea
      - GITEA__database__USER=gitea
      - GITEA__database__PASSWD=gitea_password
      - GITEA__server__HTTP_PORT=80
      - GITEA__actions__ENABLED=true
      - GITEA__packages__ENABLED=true
    volumes:
      - gitea_data:/data
    networks:
      gitea_qnet:
        ipv4_address: 192.168.1.111
      internal_network:
    depends_on:
      - db

  db:
    image: postgres:15-alpine
    container_name: gitea_db
    environment:
      - POSTGRES_USER=gitea
      - POSTGRES_PASSWORD=gitea_password
      - POSTGRES_DB=gitea
    volumes:
      - postgres_data:/var/lib/postgresql/data
    networks:
      - internal_network

volumes:
  gitea_data:
  postgres_data:

networks:
  gitea_qnet:
    driver: qnet
    driver_opts:
      iface: "eth0"
    ipam:
      driver: qnet
      options:
        iface: "eth0"
      config:
        - subnet: 192.168.1.0/24
          gateway: 192.168.1.1
  internal_network:
    driver: bridge
Let me explain the important parts of the configuration above. First, the following settings are essential to enable Actions and container registry:
- GITEA__actions__ENABLED=true
- GITEA__packages__ENABLED=true
Without these settings, the corresponding menus won’t appear in the settings screen and you won’t be able to use them.
For network-related settings, I’m configuring bridge connection to assign a fixed IP within the home network (192.168.1.0). Without this configuration, you would access the container via port forwarding using the QNAP host’s IP. Personally, I prefer to avoid specifying port numbers (because it’s a hassle) and don’t want to manage which ports are in use, so I basically use bridge connections.
After starting the container and accessing the web interface, you should see an installation screen. After installation and user registration, you should see a top page like the image below.
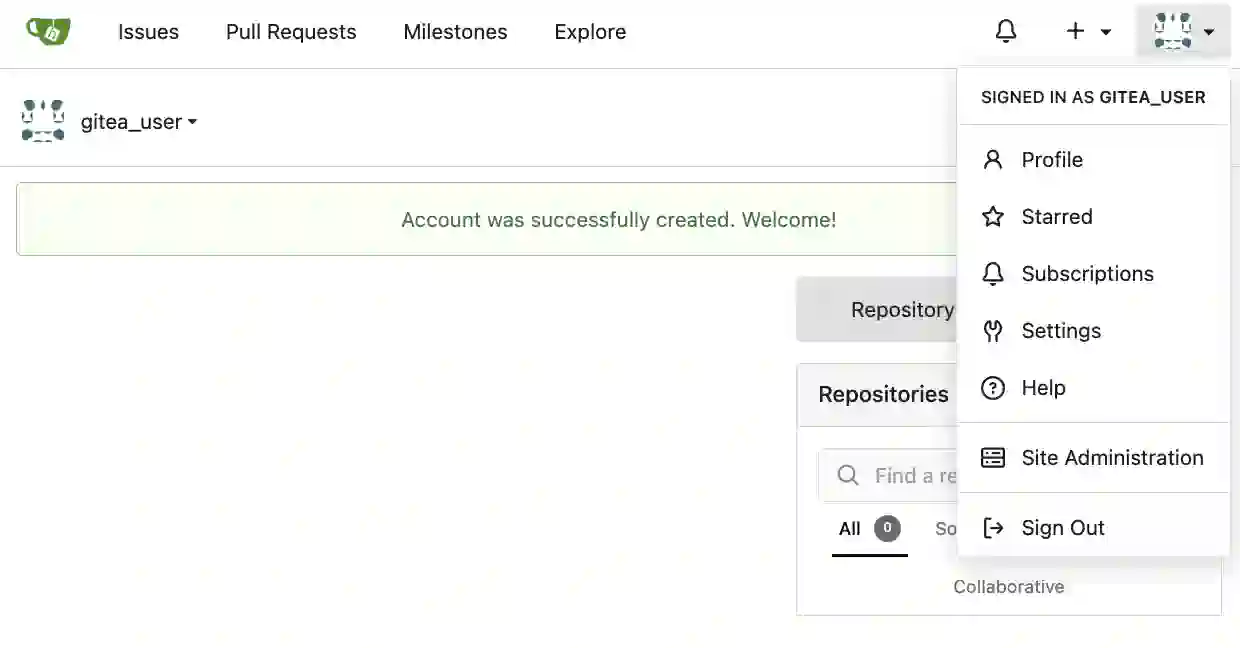
Click the user icon in the top right and click the “Settings” menu.
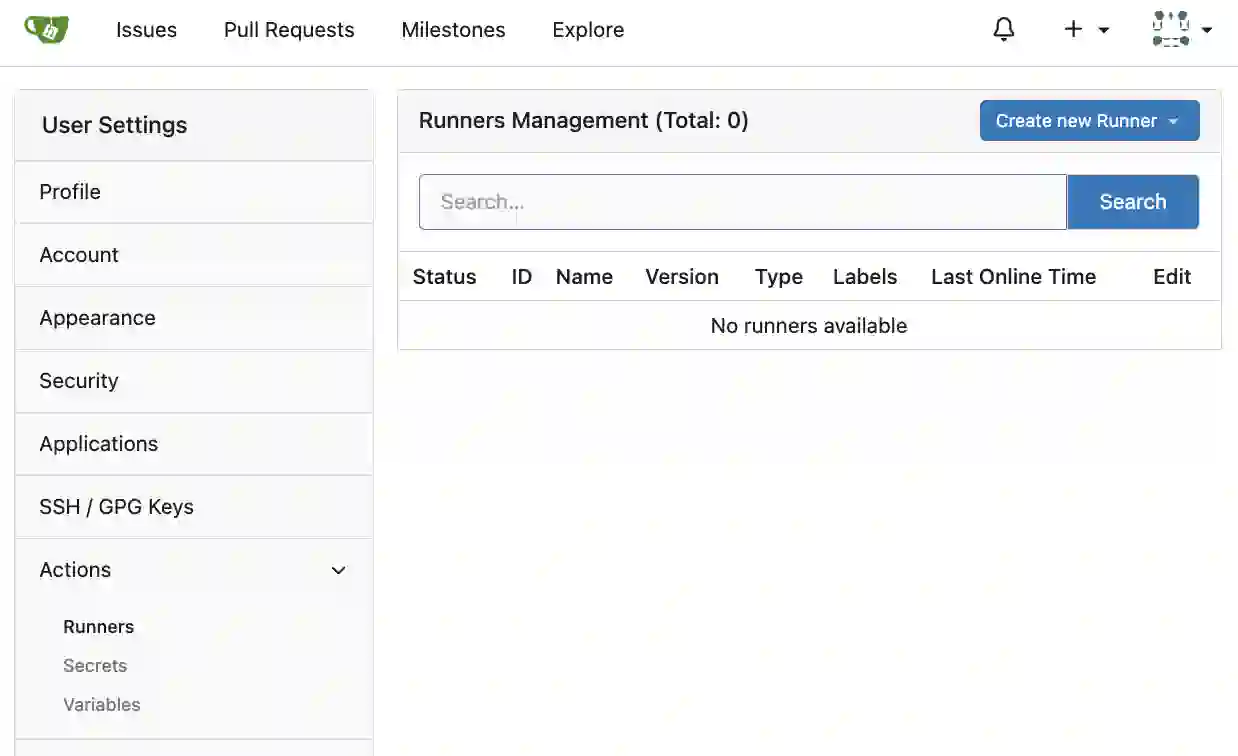
In the settings screen, click “Runners” from the “Actions” menu in the sidebar, then click the “Create new Runner” button in the top right.
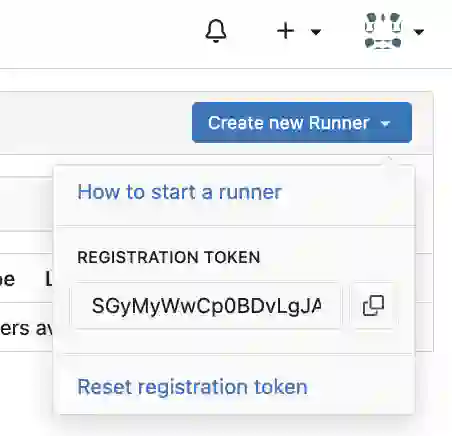
A token will be displayed, so copy this token.
Installing Gitea Runner
Create the following docker-compose.yaml to install Gitea Runner.
version: "3.7"
services:
  gitea-runner:
    image: gitea/act_runner:0.2.12
    container_name: gitea_runner
    volumes:
      - /var/run/docker.sock:/var/run/docker.sock
      - runner_data:/data
    environment:
      - GITEA_INSTANCE_URL=http://192.168.1.111
      - GITEA_RUNNER_REGISTRATION_TOKEN=Token obtained from Gitea settings screen
    networks:
      gitea_runner_qnet:
        ipv4_address: 192.168.1.112
    restart: unless-stopped

volumes:
  runner_data:

networks:
  gitea_runner_qnet:
    driver: qnet
    driver_opts:
      iface: "eth0"
    ipam:
      driver: qnet
      options:
        iface: "eth0"
      config:
        - subnet: 192.168.1.0/24
          gateway: 192.168.1.1
Set the token obtained from Gitea’s settings screen in GITEA_RUNNER_REGISTRATION_TOKEN. The docker.sock is mounted because we expect to use docker commands within Actions.
Caution: Be careful not to commit docker-compose.yaml files containing tokens to GitHub or other repositories.
After the container starts and you wait a moment, you should see something like the display below.
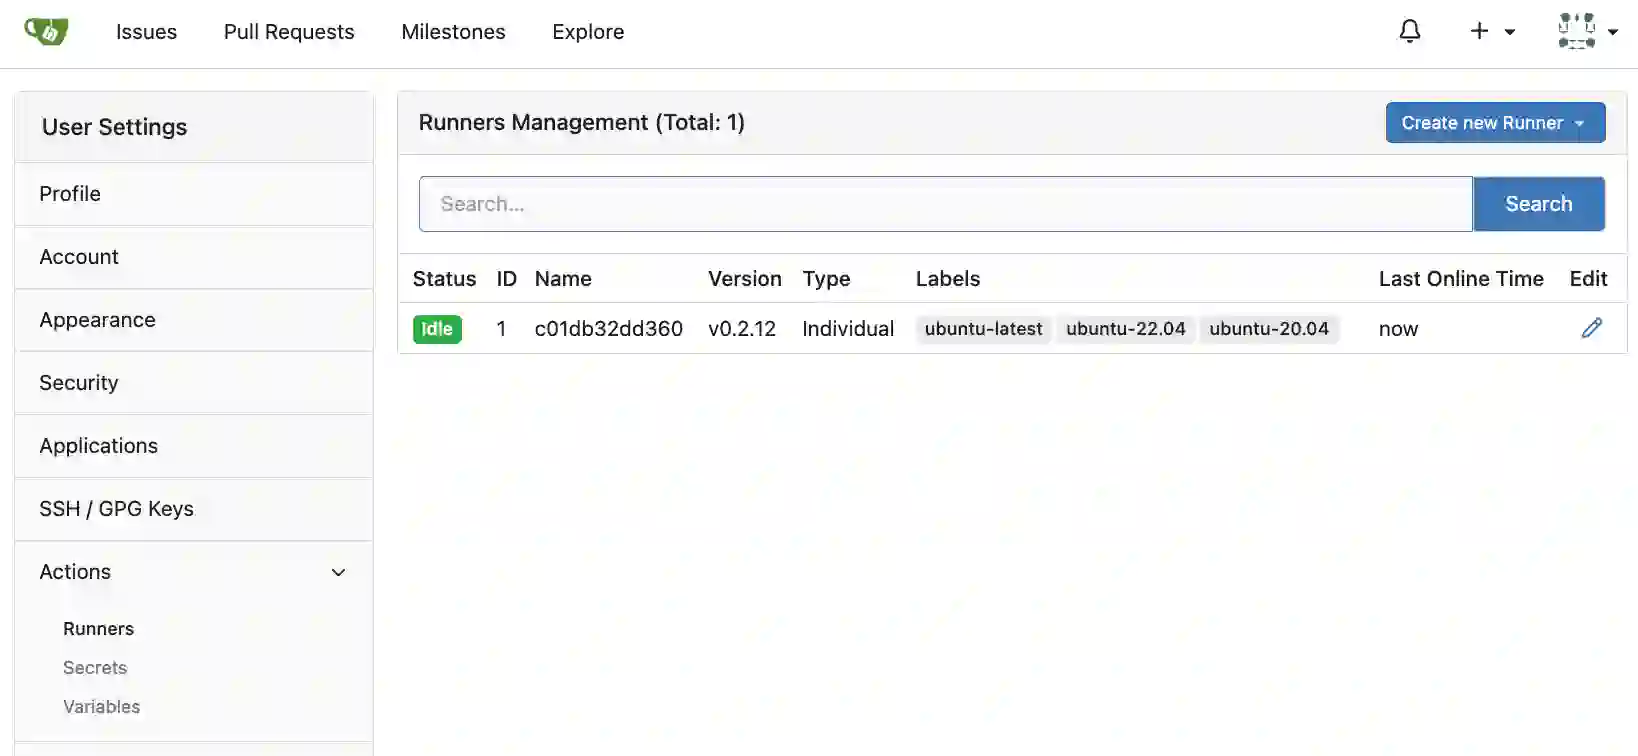
You can confirm that a new runner has been registered in Gitea’s runner management screen. If it doesn’t work, check the runner container logs as there’s likely some error being displayed.
Verification
Now that the necessary settings should be complete, let’s verify the actual operation. We’ll confirm that we can register a Docker image with a Go HelloWorld binary embedded in Gitea’s registry.
The source files are as follows:
main.go
package main

import "fmt"

func main() {
	fmt.Println("Hello, World!")
}
Dockerfile
# Build stage
FROM golang:1.21-alpine AS builder

WORKDIR /app
COPY main.go .
RUN go build -o hello main.go

# Runtime stage
FROM alpine:latest
RUN apk --no-cache add ca-certificates
WORKDIR /root/
COPY --from=builder /app/hello .
CMD ["./hello"]
And create Gitea Actions with the following content:
.gitea/workflows/build.yaml
name: Build and Push Docker Image

on:
  push:
    branches:
      - main

jobs:
  docker:
    runs-on: ubuntu-latest
    steps:
      - name: Checkout
        uses: actions/checkout@v4

      - name: Set up Docker Buildx
        uses: docker/setup-buildx-action@v3
        with:
          config-inline: |
            [registry."192.168.1.111"]
              http = true
              insecure = true

      - name: Login to Gitea Registry
        uses: docker/login-action@v3
        with:
          registry: 192.168.1.111
          username: ${{ gitea.actor }}
          password: ${{ secrets.CREATE_PACKAGES }}

      - name: Build and push
        uses: docker/build-push-action@v5
        with:
          context: .
          push: true
          tags: |
            192.168.1.111/${{ gitea.repository }}:latest
            192.168.1.111/${{ gitea.repository }}:${{ gitea.sha }}
When logging into Gitea’s registry, you need a token with write permissions to packages. The default GITEA_TOKEN doesn’t have write permissions, so you need to create a new token.
To create a token, go to the account settings screen shown in the image below, display “Applications” settings, and create an access token.
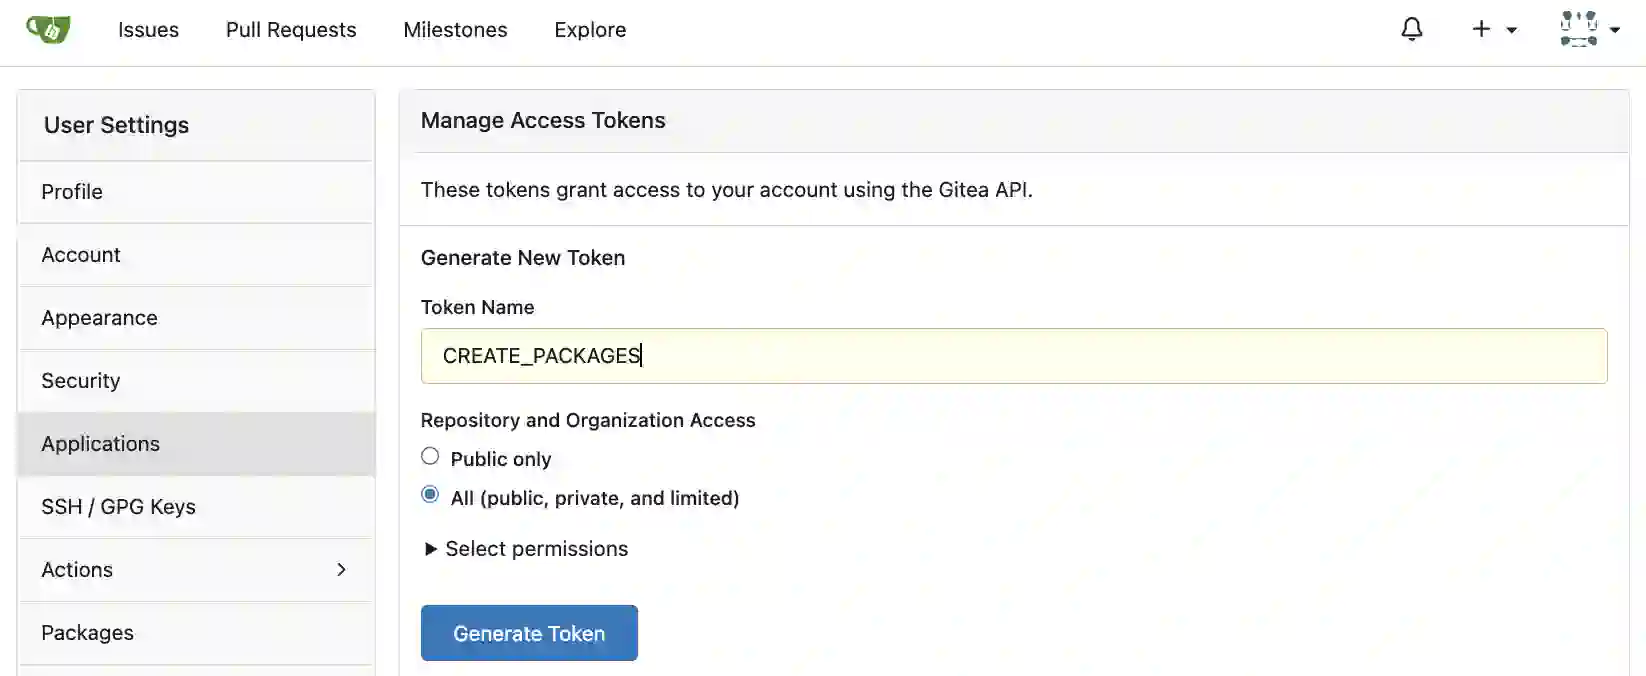
Here, set any token name and configure appropriate permissions. Click Select permissions above the “Generate Token” button to display the list of permissions. Scroll down through the list and you should find the package item.
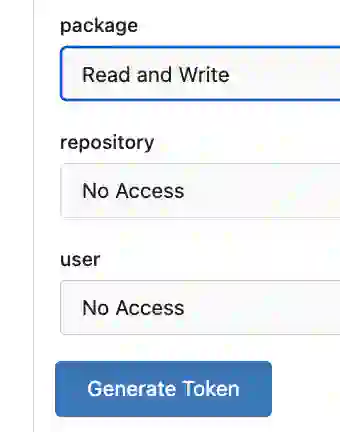
Select “Read and Write” and click “Generate Token” to create the token. Don’t forget to copy this token value. Finally, let’s create a secret variable with this token value.
To create a secret variable, go to “Actions” → “Secrets” in the account or repository settings screen.
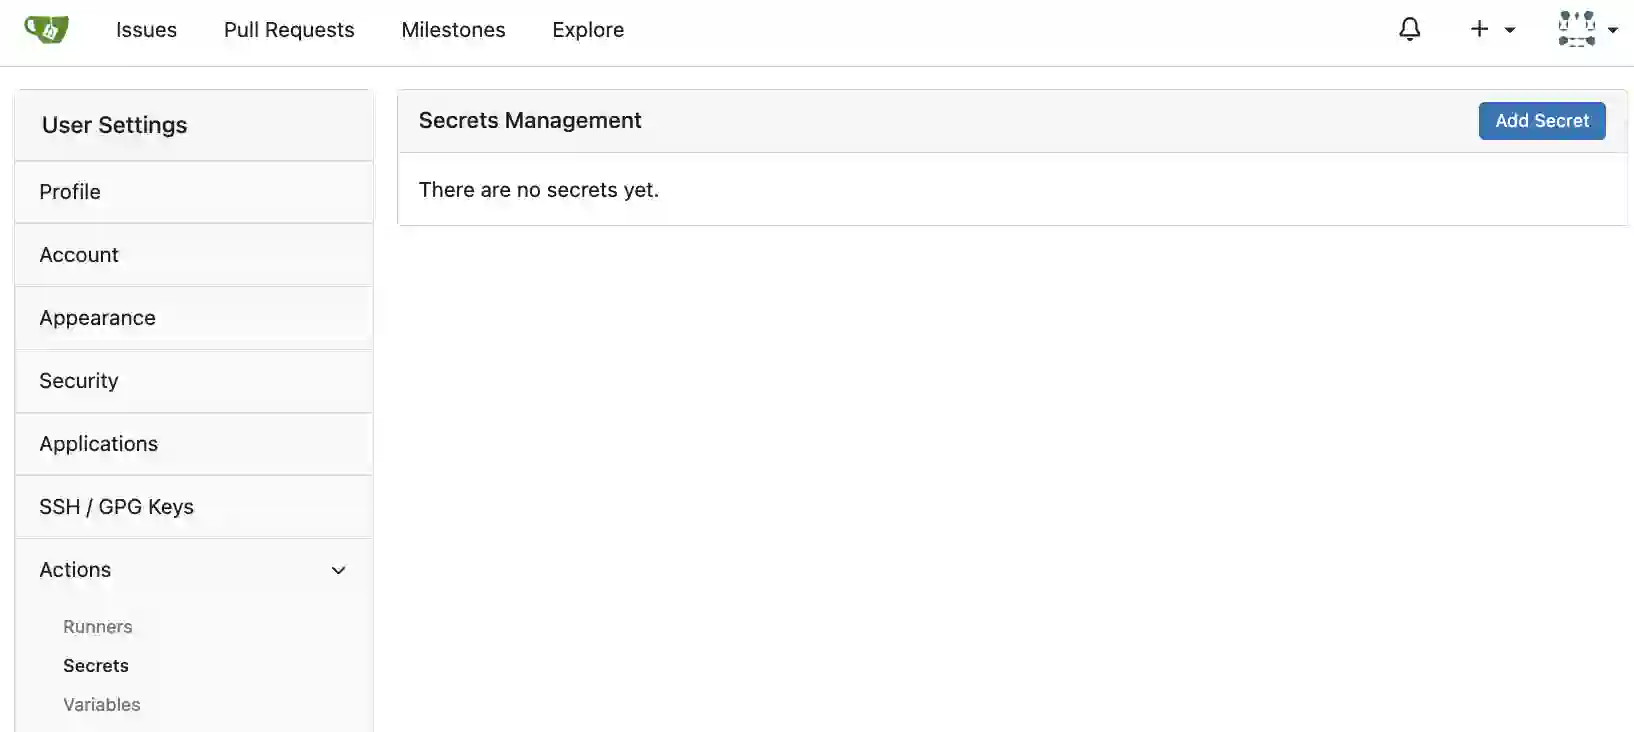
The secret management screen will be displayed, so click the “Add Secret” button.
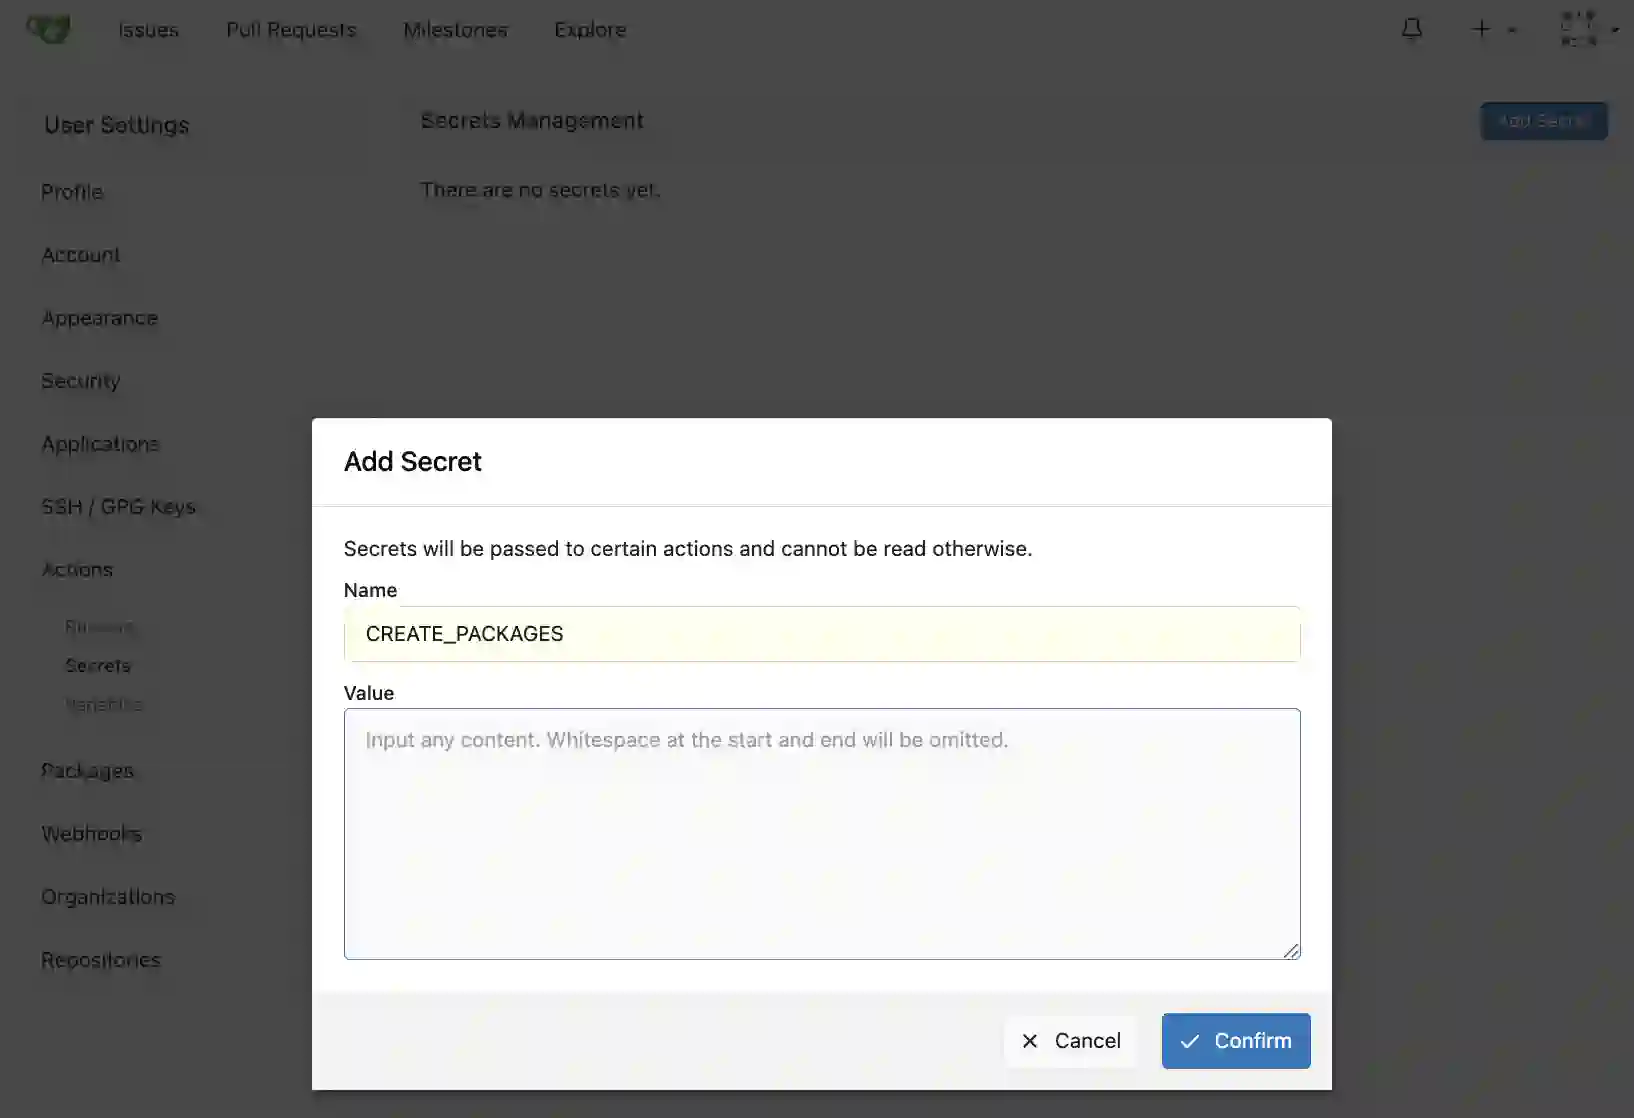
A dialog will appear, so enter any secret name (the name specified in docker-compose.yaml) and paste the previously generated token to complete the process. Now that code creation is finished, let’s push the code we’ve created so far. First, create a test repository in Gitea (here called test_repo). Also enable Actions in the repository settings screen.
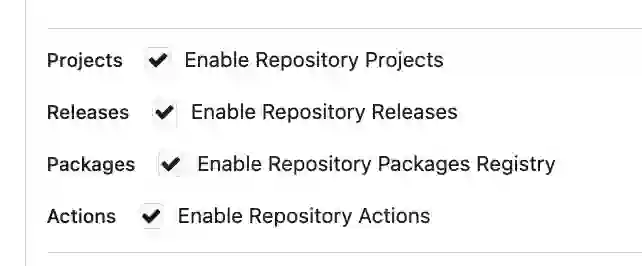
By default, the “Actions” checkbox above is OFF, so turn it ON. Now that preparation is complete, let’s push the code to the repository and verify that Actions work correctly.
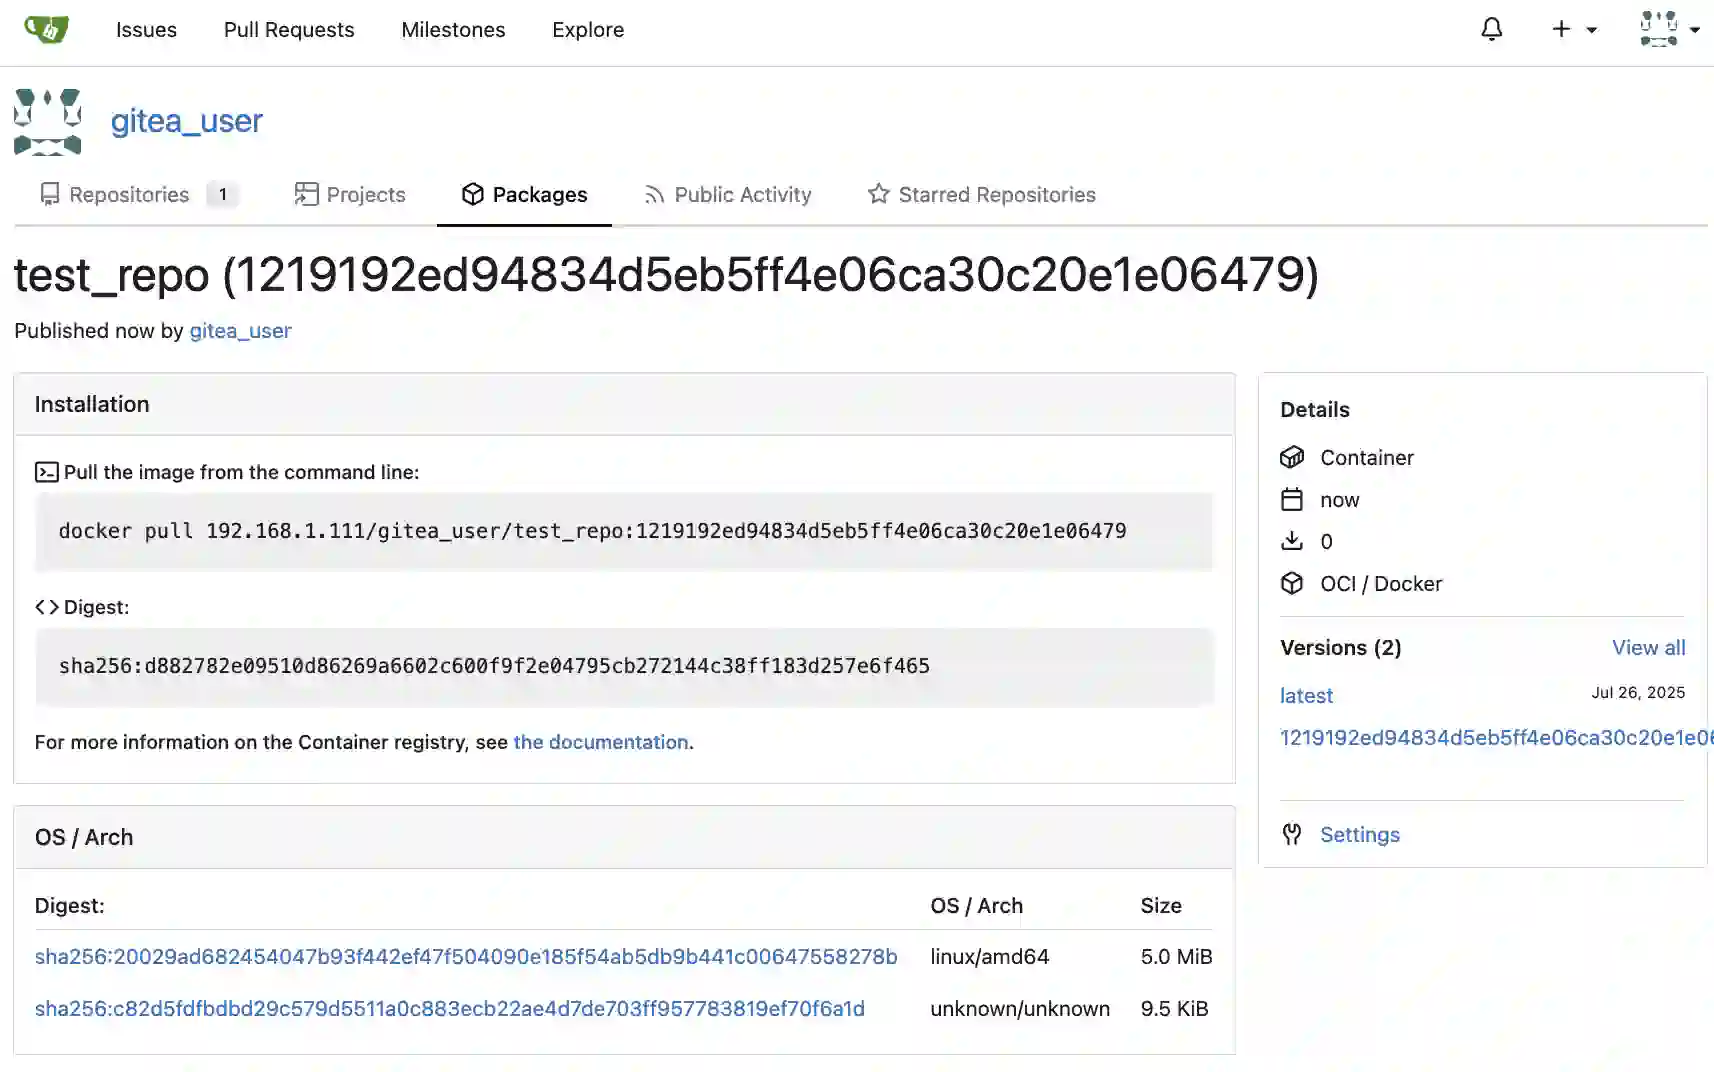
If packages are created as shown in the image above, it’s successful.